This is the fourth article in a series that explores the idea of creating a headless application, without the luxury of Sitecore Headless Services Module (Sitecore JSS). It is a continuation from Advanced NextJs To Consume Layout Service where we added the functionality to grab different types of data for our components.
In this article, we will put those tools into practice and show some examples of how this functionality can be used in our custom components and display meaningful content.
Supporting code for this article can be found here: https://github.com/deanobrien/nextjs-personalisation-for-sitecore
Example 1: Fetch the page item and display the contents of a field
The example below shows a custom component called BootStrapContent (whith pathName and uid params). We import fetchPageItemFromCached function and use it to grab the data for the page item from the API.
import { fetchPageItemFromCached } from '@/app/lib/data';

export default async function BootStrapContent({ pathName, uid }: { pathName: string, uid: string }) {
	const pageItem= await fetchPageItemFromCached(pathName,false,false,false);
	return (
	     <div className="rich-text" dangerouslySetInnerHTML={{ __html: pageItem.Fields.content }} />
	);
}
Note: we are using dangerouslySetInnerHTML to output our fields HTML content. This as the name suggests has some risk attached, but at the time of writing I am unsure of any other approach. So use at your own risk. Some more info on when to use here: When to use dangerouslySetInnerHTML in React? | Refine
Example 2: Fetch component and read rendering parameters
The example below shows a custom component called BootStrapColumn (whith pathName and uid params). We import our functions and use both pathname and uid to get our single component. From this we read the components parameters (component.PAR) and pass this to getQueryVariable function to extract the “Column Size”. This can then be inserted into the relevant HTML block and returned to the rendering device.
import { getQueryVariable,fetchComponentFromCached} from '@/app/lib/data';
import PlaceHolder from '../Core/PlaceHolder';

export default async function BootStrapColumn({ pathName, uid }: { pathName: string, uid: string }) {
	const component = await fetchComponentFromCached(pathName,uid)
	const colSize = await getQueryVariable("Column Size", component.PAR);
	const size='col-md-'+colSize;
	const placeholderName='BootStrap-Column-'+uid+'-0'
	return (
		<div className={size}>
			<PlaceHolder pathName={pathName} placeHolderName="bootstrap-column" />
			<PlaceHolder pathName={pathName} placeHolderName={placeholderName} />
		</div>
	);
}
Note: In the example above you will see we are outputting the placeholder twice. This is a bit of a hack to deal with dynamic vs static placeholders. Only one should output data. There will be a much better way of doing this but its not that important for the purposes of this demo.
Example 3: Adding inline style
The example below shows how to to output an inline style block within a component.
'use client'
export default function BootStrapColourDemo({ pathName, uid, component }: { pathName: string, uid: string, component:any }) {
	let styleBlock=<></>;
	styleBlock=
	<style global jsx>{`
        body {
          background: #fff;
        }
      `}</style>;
	return (
	<>
	{styleBlock}
	</>
	);
}
Note: I am aware that NextJs comes with a full range of modules to both handle conditional output and build CSS as required (per component / module etc). So you should never really need to use the above… but at the time of writing, I hadnt had the time to research these areas fully and needed the style block.
Example 4: Map a collection of objects to individual components
The example below shows a custom component called BootStrapAlbum (whith pathName and uid params). We use the path to fetch the page data in the usual way. Then within the return block of the component itself, we use the javascript map() method to pass each object from the collection to an individual ‘NavItem’ component.
import { fetchPageItemFromCached,fetchComponentFromCached,getQueryVariable } from '@/app/lib/data';
import NavItem from '../Custom/NavItem';
export default async function BootStrapAlbum({ pathName, uid }: { pathName: string, uid: string }) {

        const pageItem= await fetchPageItemFromCached(pathName,true,false,false);

        ... ommitted see github for full ...

	return (
		<div className="album py-5">
			<div className="container">
				<div className="row">
				{
					pageItem.Fields.navigationitems.TreeListFields.map(
						(obj) => (
							  <>
                              <NavItem obj={obj} enableLinks={enableLinks} isLandscape={isLandscape} />
							  </>
                                                          )
					)
				}
				</div>
			</div>
		</div>
	);
}
The NavItem takes in the object (and other params), which means we then dont need to retrieve the component details for every rendering of the NavItem.
export default async function NavItem({ obj, enableLinks, isLandscape, }: { obj:any, enableLinks: boolean, isLandscape:boolean }) {
...
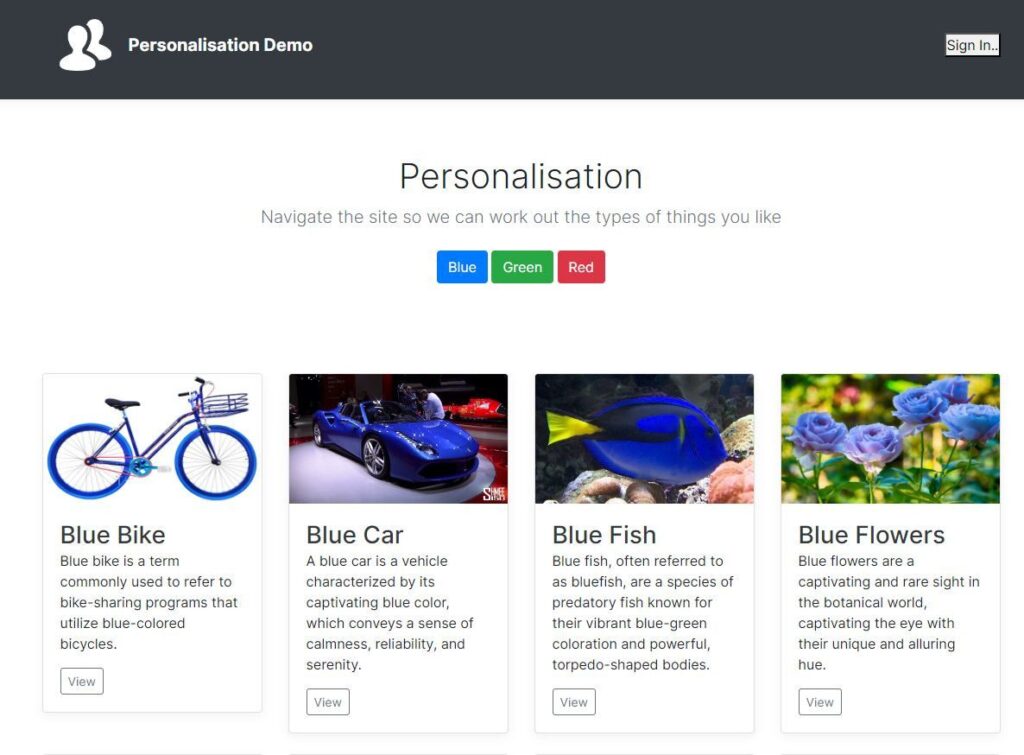
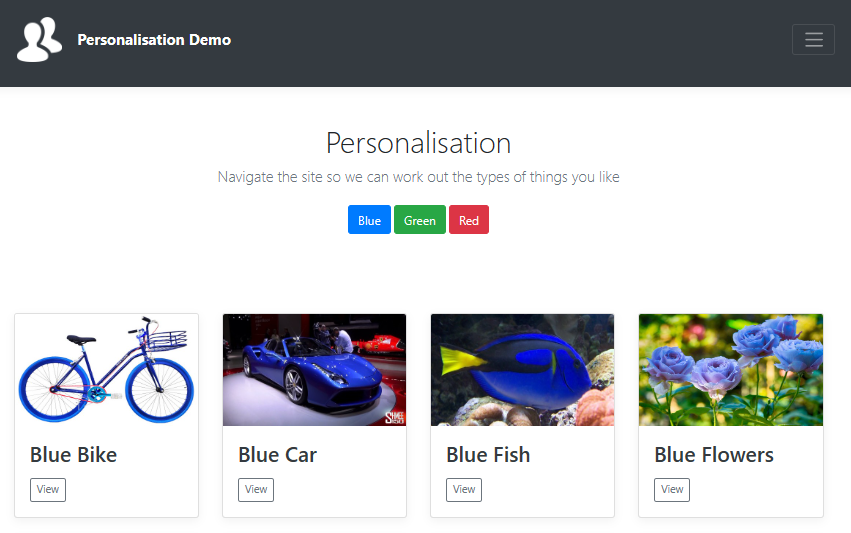
}Using a combination of the above examples, we are then able to flesh out all of the custom components that we added in the earlier demo. Using the MVC components from https://github.com/deanobrien/personalisation-for-sitecore as a starting point, we can quickly build out the application to closely resemble the original MVC application.