In February 2024, Microsoft Azure retired the 'Classic Application Insights' and forced people to migrate to 'Workplace-based' resources. In reality the migration involved very little effort or change, just a few clicks of the button. Luckily there was no change needed to the applications that sent the telemetry data and the instrumentation key remained the same in most situations.
What became apparent though is that Microsoft are also planning on retiring access to their application insights API using PI keys. This will be retired by 31 March 2026, this will be replaced by Microsoft Entra authentication for Application Insights. This currently how our Applications Insights Module queries the resource, so its clear some action is required to bring it up to date.
Switching to Entra
Microsoft advise you can either use a Managed Identity or a Service Principle. Whilst they recommend the former, I am more familar with service principles, so opted to take that route.
Register an App
- To register an app, open the Active Directory (Entra) Overview page in the Azure portal.
- Select App registrations from the side bar.
- Select New registration
- On the Register an application page, enter a Name for the application.
- Select Register
- On the app's overview page, select Certificates and Secrets
- Note the Application (client) ID. It's used in the HTTP request for a token.
- In the Client secrets tab Select New client secret
- Enter a Description and select Add
- Copy and save the client secret Value.
More info microsoft site: Register app for token
Set up authentication
- On the app's overview page, select API permissions.
- Select Add a permission.
- On the APIs my organization uses tab, search for Application Insights and select Application Insights API from the list.
- Select Delegated permissions.
- Select the Data.Read checkbox.
- Select Add permissions.
Grant access to your resource
- From your Application Insights resource overview page, select Access control (IAM).
- Select Add role assignment.
- Select the Reader role and then select Members.
- On the Members tab, choose Select members.
- Enter the name of your app in the Select box.
- Select your app and choose Select.
- Select Review + assign.
More info on microsoft site: Azure AD Authenticatoin
Configure / Reconfigure Sitecore Module
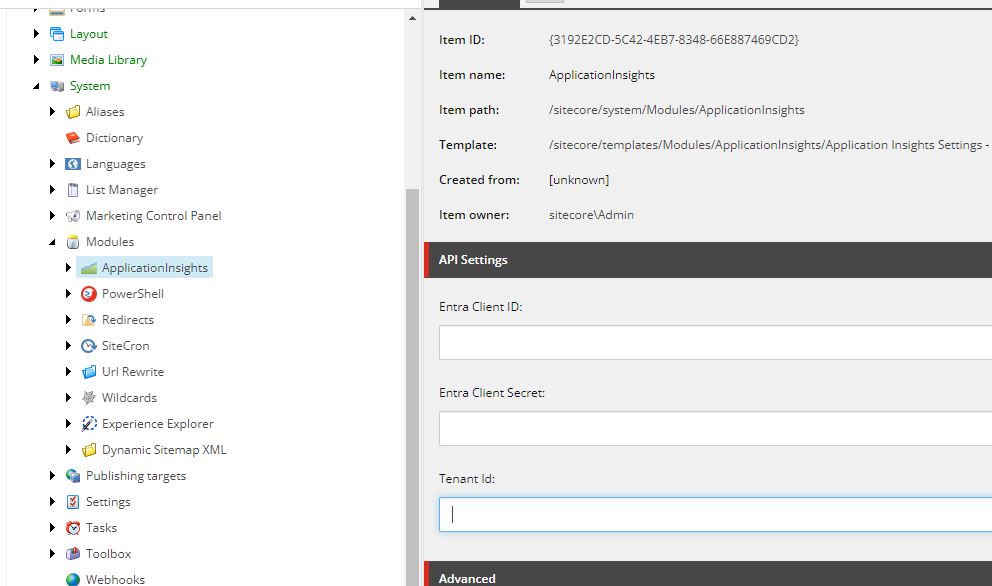
In order to start using Microsoft Entra Authentication with this module, you will need to download the latest version (from GitHub). When you install the new sitecore items, you will see the module root page (sitecore/system/Modules/ApplicationInsights) has some additional settings:
- Enter Client ID
find this in overview screen for Entra App - labelled 'Application (client) ID' - Entra Client Secret
You should have saved this in step 10 of Register an App - Tenant ID
find this in overview screen for Entra App - labelled 'Directory (tenant) ID'

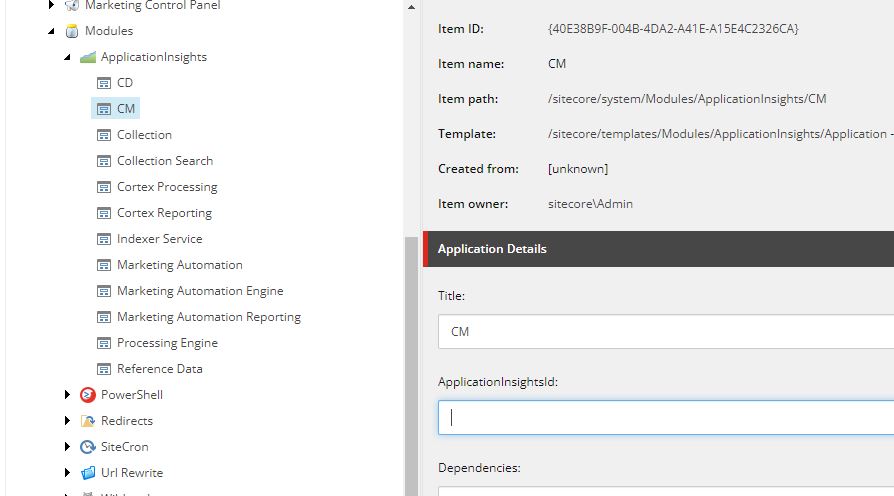
If you are setting this up for the first time, you need to obtain the Application ID for each of the Application Insight resources that you want to monitor. You can find this by going to the resource and selecting the "API Access" pane. At the top of that screen you will see the required Application ID.
You then need to create a child under the main module root (page shown above), for each resource you want to monitor. Then add the Application ID and also title.

Note: If you are upgrading the module, you will notice that the previous field ApplicationInsightsSecret has been removed. This is only required when querying the application Insights API using the old API keys method.
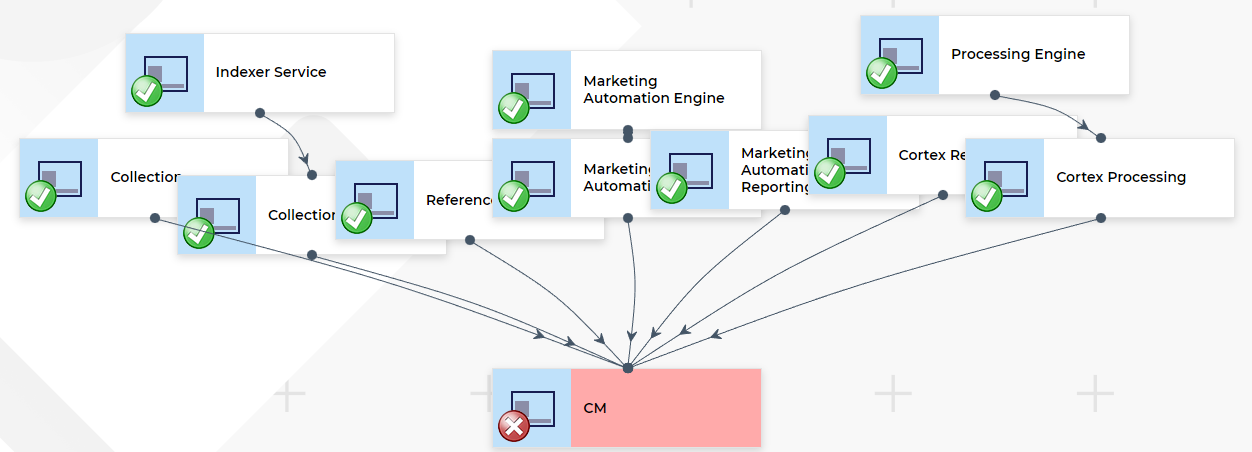
Finally, once you have added all of the resources. You can go back and define any dependencies between them, by selecting another resource in the dependencies. This determines which other resources to show in the graphic display at the top of the page (with arrows between them).
If you then go to Dashboard => Application Insights - You should see the module in action.
